 |
| Manga aval upma/Mavinakayi avalakki/Raw mango poha |
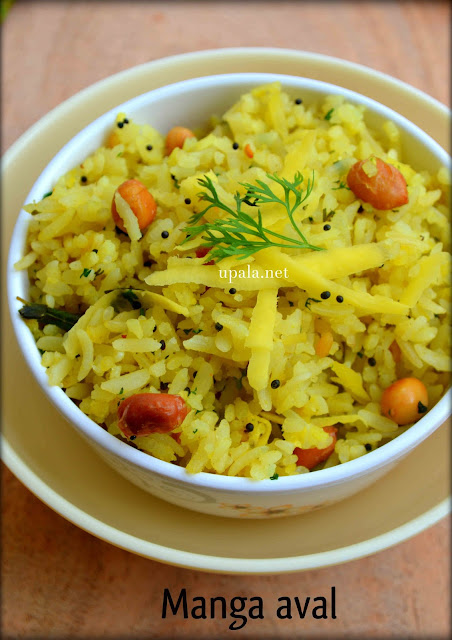
Manga aval upma/Mavinakayi avalakki/Raw mango poha is a healthy breakfast recipe that can be prepared easily.
Ingredients:
- 1 Raw mango
- 4 cups Poha/aval/avalakki (thick variety)
- 1/4 tsp Turmeric powder
- 1 Green chilli
- 1 tsp Jaggery
- 2 tbsp Corriander leaves (finely chopped)
- As per taste Salt
For Seasoning
- 1/2 tsp Mustard seeds
- A generous pinch Hing
- 2 tsp Raw Ground nuts
- A spring Curry leaves
- 2 Red chillies
- 1/2 tsp Urad dal
Method:
1) Wash the poha for 2-3 times in a colander and leave it to sit for few minutes.
2) Mean time, peel the outer skin of raw mango. Grate only the 1/4th portion of mango and chop the rest into big pieces.
3) Grind the raw mango pieces and green chilli to fine paste.
 |
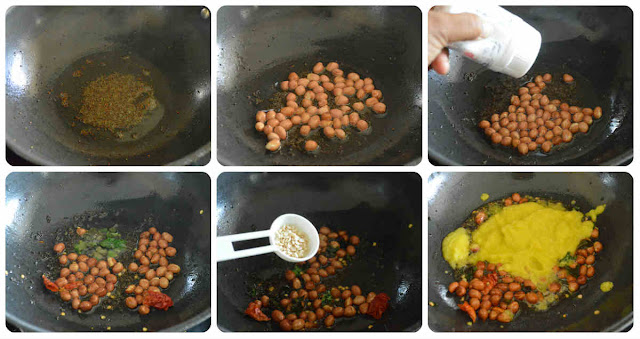
4) Heat oil in a kadai and add mustard seeds to crackle.
5) Next, add raw groundnuts and fry for few minutes. Drizzle few hing powder and mix well.
6) Add roughly chopped red chillies and curry leaves, urad dal and fry till urad dal turn light brown.
7) Now, add the raw mango paste and fry again.
 |
8) The raw mango paste will get cooked and start leaving oil on sides. At this time, add salt, turmeric powder and mix well.
9) Add the washed poha and mix well.
10) Time to add the reserved raw mango (grated ones) to your poha , next add jaggery and do a quick mix.
11) Finally, garnish with corriander leaves and mix well.
Yummy Raw mango poha is ready.
 |
Tips:
1) For enhanced taste, you can add few more finely chopped green chillies while seasoning.
2) The raw mango needs to be sour in order to achieve better taste.
 |
For video tutorial on step by step instructions, please click here


No comments :
Post a Comment